
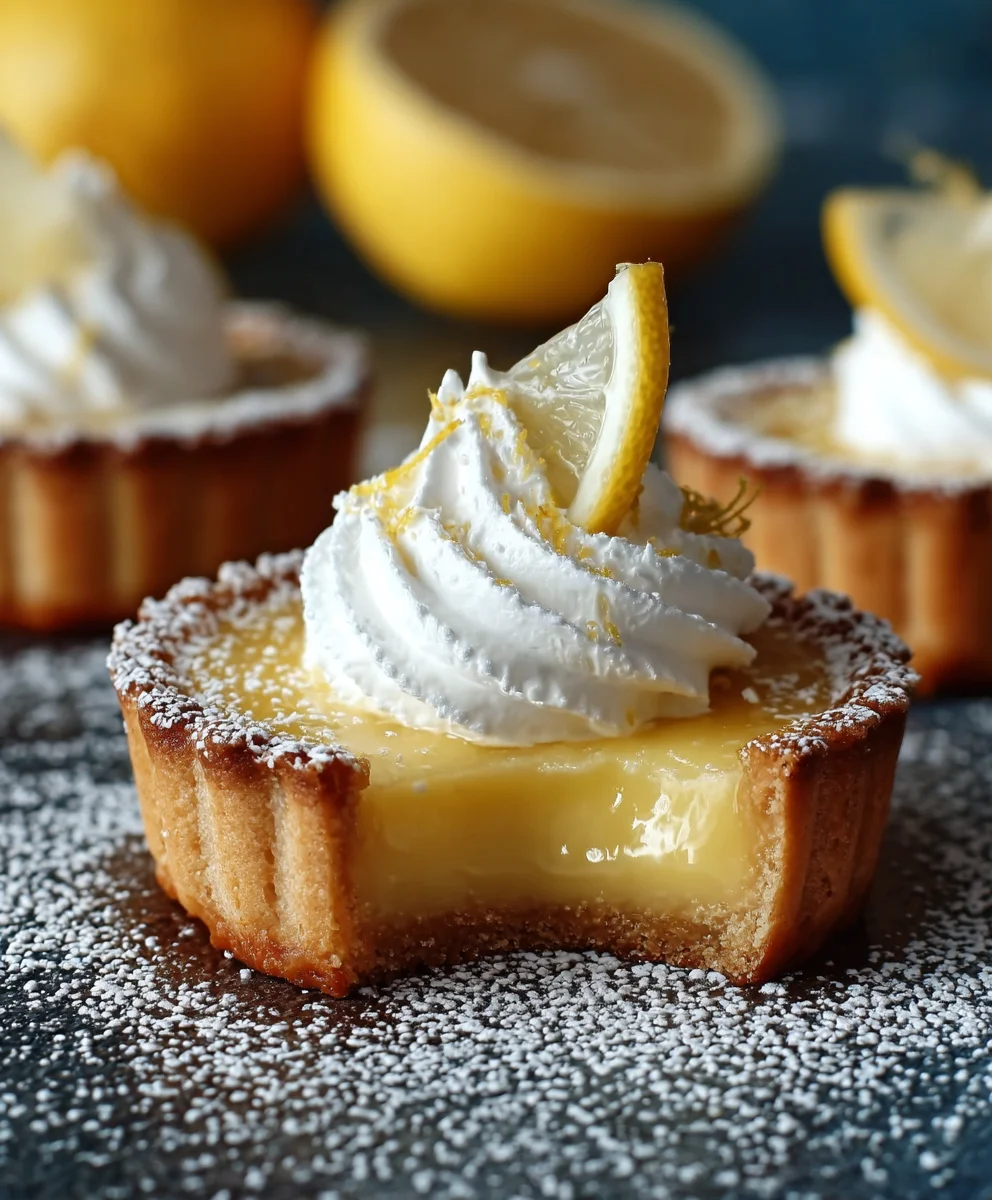
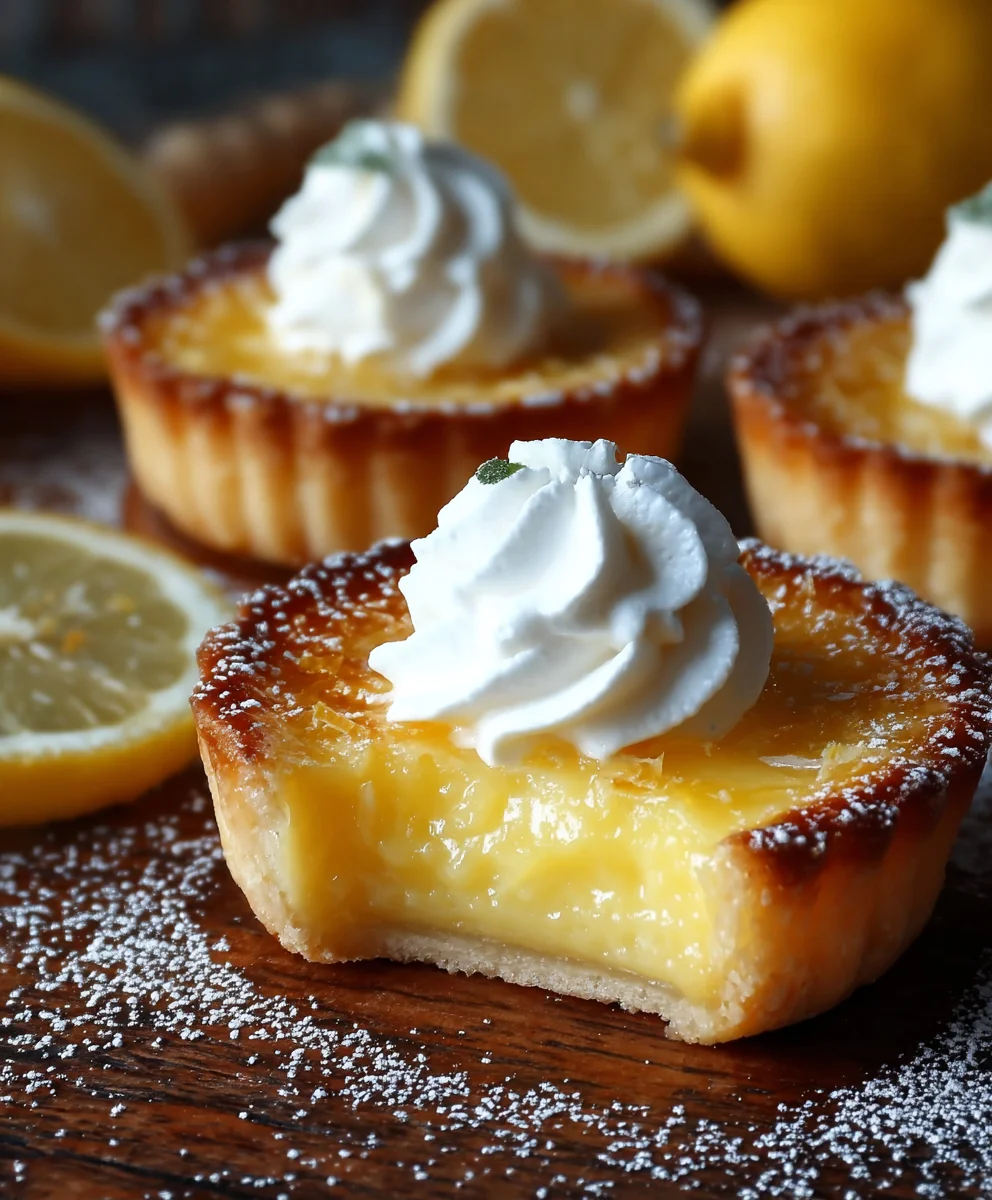
Petites Tartes Magiques au Citron – these delicate little lemon tarts are more than just a dessert; they are a whimsical journey for your taste buds. Imagin extracte a sunshine-yellow curd, bursting with zesty citrus flavor, cradled within a crisp, buttery pastry shell. It’s no wonder these enchanting treats hold such a special place in our hearts and kitchens. People are absolutely captivated by their perfect balance of sweet and tart, their delightful texture contrast, and of course, their undeniable charm. What truly makes these Petites Tartes Magiques au Citron so magical is the way they manage to be both sophisticated enough for a special occasion and wonderfully comforting for an everyday indulgence. They’re a testament to the power of simple, quality ingredients coming together to create something truly extraordinary. Get ready to be spellbound as we unlock the secrets to creating these little wonders yourself.
Ingredients:
- 2 cups all-purpose flour
- 1/2 cup granulated sugar
- 1/4 teaspoon salt
- 1 cup (2 sticks) unsalted butter, cold and cut into cubes
- 1 large egg yolk
- 2 tablespoons ice water
- 1 cup fresh lemon juice (from about 4-6 lemons)
- 3/4 cup granulated sugar (for the filling)
- 4 large egg yolks
- 1/2 cup unsalted butter, softened
- Zest of 2 lemons
- 1/4 cup powdered sugar (for dusting)
- Fresh mint leaves (for garnish, optional)
For the Tart Dough
Mixing the Dough
- In a large bowl, whisk together the all-purpose flour, 1/2 cup of granulated sugar, and the salt. This dry mixture forms the base of our delicious tart crust. Ensure everything is evenly distributed to prevent pockets of salt or sugar in the final dough.
- Add the cold, cubed unsalted butter to the dry ingredients. Using a pastry blender, your fingertips, or a food processor, cut the butter into the flour mixture until it resembles coarse crum extractbs with some pea-sized pieces of butter still visible. These butter pieces are key to creating a flaky crust; they melt during baking, leaving tiny air pockets. Work quickly to prevent the butter from melting too much from the warmth of your hands.
- In a small bowl, whisk together the large egg yolk and the 2 tablespoons of ice water. This liquid mixture will help bind the dough together.
- Gradually add the egg yolk and ice water mixture to the flour and butter mixture, mixing gently with a fork or spatula until the dough just comes together. Be careful not to overmix, as this can develop the gluten too much, resulting in a tough crust. The dough should be shaggy but hold together when squeezed.
Chilling and Shaping the Dough
- Turn the dough out onto a lightly floured surface and gently bring it together into a disc. Do not knead it. Wrap the disc tightly in plastic wrap and refrigerate for at least 30 minutes, or up to 2 days. Chilling is crucial; it allows the gluten to relax and the butter to firm up again, making the dough easier to roll and preventing shrinkage during baking.
- Preheat your oven to 375°F (190°C). Lightly grease miniature tart pans or a miniature muffin tin.
- On a lightly floured surface, roll out the chilled dough to about 1/8-inch thickness. Using a round cutter slightly larger than your tart molds, cut out circles of dough. Gently press the dough circles into the tart pans, ensuring they are evenly distributed and fit snugly against the sides and bottom. Trim any excess dough. You can re-roll scraps once, but avoid overworking them.
- Prick the bottom of each tart shell several times with a fork. This helps to prevent the crust from puffing up excessively during baking.
- Line each tart shell with parchment paper or foil and fill with pie weights, dried beans, or uncooked rice. This is called blind baking and it helps the crust maintain its shape.
- Bake for 15 minutes. Carefully remove the parchment paper and weights. Continue to bake for another 5-7 minutes, or until the crust is lightly golden brown. Remove from the oven and let them cool completely in the pans before removing.
For the Lemon Filling
Making the Lemon Curd
- While the tart shells are cooling, prepare the luscious lemon filling. In a medium saucepan (off the heat), whisk together the fresh lemon juice, 3/4 cup of granulated sugar, and the 4 large egg yolks. Whisk until the mixture is smooth and no lumps of yolk remain.
- Place the saucepan over medium-low heat. Cook, stirring constantly with a whisk, until the mixture thickens enough to coat the back of a spoon, about 5-8 minutes. It’s important to cook this gently and stir continuously to prevent the eggs from scrambling. If you don’t have a whisk, a heatproof spatula works well too. Aim for a consistency that is thick but still pourable.
- Remove the saucepan from the heat. Gradually whisk in the 1/2 cup of softened unsalted butter, one tablespoon at a time, until it is completely incorporated and the curd is smooth and glossy. The butter adds richness and a beautiful sheen to the curd.
- Stir in the zest of 2 lemons. The lemon zest will infuse the curd with an even more intense lemon flavor and aroma.
- Strain the lemon curd through a fine-mesh sieve into a clean bowl to remove any zest or potential small bits of cooked egg, ensuring a silky smooth texture. Press down on the zest with the back of a spoon to extract as much flavor as possible.
Assembling the Petites Tartes
Filling and Finishing
- Once the tart shells are completely cool, carefully spoon or pipe the lemon curd into each shell, filling them almost to the brim. Ensure an even distribution of the filling.
- Refrigerate the filled tartes for at least 1 hour to allow the lemon filling to set completely. This step is crucial for achieving that perfect, sliceable texture.
- Just before serving, lightly dust the tops of the chilled petites tartes with powdered sugar using a fine-mesh sieve. This adds a delicate sweetness and an elegant finish.
- If desired, garnish each tart with a fresh mint leaf for a pop of color and freshness. These “Petites Tartes Magiques au Citron” are best served chilled.
Conclusion:
And there you have it – your very own batch of delightful Petites Tartes Magiques au Citron! We hope you enjoyed bringin extractg this recipe to life and that the tangy citrus filling and crisp pastry exceeded your expectations. These mini tarts are perfect for a sophisticated afternoon tea, a bright dessert after a lovely meal, or simply as a sweet treat to brighten your day. Serve them chilled or at room temperature, perhaps with a dusting of powdered sugar or a dollop of fresh whipped cream for an extra touch of elegance.
Don’t be afraid to experiment! For a different flavor profile, try adding a pinch of cardamom or lavender to the curd, or consider a meringue topping instead of the standard pastry crust. The beauty of Petites Tartes Magiques au Citron lies in their versatility. We encourage you to make them your own and share the magic with your loved ones. Happy baking!
Frequently Asked Questions:
Q1: How should I store leftover Petites Tartes Magiques au Citron?
You can store any leftover Petites Tartes Magiques au Citron in an airtight container in the refrigerator for up to 3 days. The pastry may soften slightly over time, but they will still be delicious.
Q2: Can I make the lemon curd ahead of time?
Absolutely! The lemon curd for your Petites Tartes Magiques au Citron can be made up to 2 days in advance. Once cooled completely, press plastic wrap directly onto the surface of the curd to prevent a skin from forming, then store it in the refrigerator.
Magic Lemon Tarts – Easy Recipe
Delightful and easy-to-make magic lemon tarts with a buttery, flaky crust and a zesty, smooth lemon filling. Perfect for any occasion.
Ingrédients
-
2 cups all-purpose flour
-
1/2 cup granulated sugar
-
1/4 teaspoon salt
-
1 cup (2 sticks) unsalted butter, cold and cut into cubes
-
1 large egg yolk
-
2 tablespoons ice water
-
1 cup fresh lemon juice (from about 4-6 lemons)
-
3/4 cup granulated sugar (for the filling)
-
4 large egg yolks
-
1/2 cup unsalted butter, softened
-
Zest of 2 lemons
-
1/4 cup powdered sugar (for dusting)
-
Fresh mint leaves (for garnish, optional)
Instructions
-
Step 1
For the tart dough: In a large bowl, whisk together the all-purpose flour, 1/2 cup of granulated sugar, and the salt. Add the cold, cubed unsalted butter and cut it into the flour mixture until it resembles coarse crumbs with some pea-sized pieces of butter visible. In a small bowl, whisk together the large egg yolk and the 2 tablespoons of ice water. Gradually add this liquid mixture to the flour and butter mixture, mixing gently until the dough just comes together. -
Step 2
Turn the dough out onto a lightly floured surface, form into a disc, wrap tightly in plastic wrap, and refrigerate for at least 30 minutes. Preheat oven to 375°F (190°C) and lightly grease miniature tart pans. Roll out the chilled dough, cut circles, and press into tart pans. Prick the bottoms, line with parchment paper, and fill with pie weights. Bake for 15 minutes, remove weights, and bake for another 5-7 minutes until golden brown. Cool completely. -
Step 3
For the lemon filling: In a medium saucepan (off the heat), whisk together the fresh lemon juice, 3/4 cup of granulated sugar, and the 4 large egg yolks until smooth. Place over medium-low heat and cook, stirring constantly, until thickened to coat the back of a spoon (about 5-8 minutes). Remove from heat and gradually whisk in the 1/2 cup of softened unsalted butter until smooth and glossy. -
Step 4
Stir in the zest of 2 lemons. Strain the lemon curd through a fine-mesh sieve into a clean bowl to ensure a silky smooth texture. -
Step 5
Assembling the tarts: Once the tart shells are completely cool, spoon or pipe the lemon curd into each shell, filling them almost to the brim. Refrigerate for at least 1 hour to allow the filling to set. -
Step 6
Just before serving, dust the tops with powdered sugar and garnish with fresh mint leaves, if desired. Serve chilled.
Informations Importantes
Valeurs Nutritionnelles (Par Portion)
Il est important de considérer ces informations comme approximatives et de ne pas les utiliser comme conseil de santé définitif.
Informations sur les Allergies
Veuillez vérifier les ingrédients pour les allergènes potentiels et consulter un professionnel de la santé en cas de doute.

Leave a Comment